Deploying LLMs on AWS EC2 Using Cog: A Complete Guide

In our previous post, we introduced the key elements of LLM training, focusing particularly on Mistral-7B and we showed the process of dataset preparation and parameter-efficient fine-tuning Mistral-7B on a novel downstream task. Moving forward, we're shifting gears from model training to deployment. This post will guide you through the process of containerizing your machine learning model with Cog and deploying it on an AWS EC2 instance as a scalable API. Whether you're new to deploying AI models or looking to refine your approach, this guide aims to equip you with the knowledge to successfully deploy your fine-tuned models in a cloud environment.
Table of contents
- Introduction
- Deployment Tools
a. Docker
b. Cog
c. AWS EC2 - Deployment Process
a. Build and Test the Docker Image Locally
b.Deploy the Model on an AWS EC2 Instance - Conclusion
Introduction
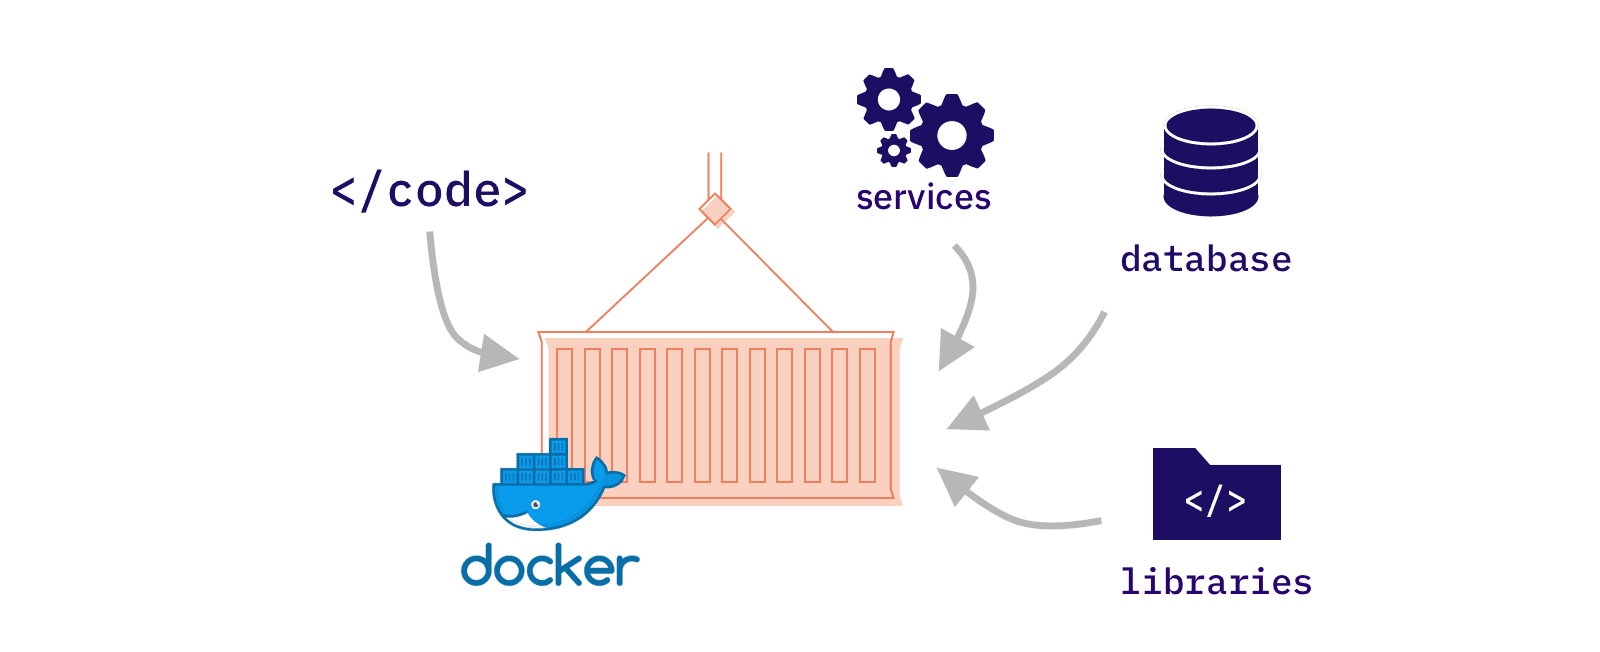
In this post, we will be carrying out the deployment process by utilizing cog, a tool that aims to build production-ready containers to serve your machine learning models as scalable APIs without caring about compatibility between CUDA and Python packages. Cog is built on top of Docker, which allows for building, shipping, and running applications in containers. We will be using Cog to develop a container for our fine-tuned Mistral-7B model inference and then we will deploy it on an AWS EC2 instance. The deployment process will be carried out in the following steps:
- First, we will prepare an inference script in compliance with Cog's requirements.
- Then we will build a Docker image using Cog. Testing the image locally is also part of this step.
- After that, we will launch an AWS EC2 instance and build the inference container on it again. Then we will test our deployment from outside the instance.
Before we dive into the step-by-step tutorial, let's take a moment to understand what Docker and Cog are and our motivation behind using them. Then we will discuss the AWS EC2 instance and the reasons behind choosing it for our deployment.
Deployment Tools
Docker
Docker is a platform for building, shipping, and running applications in containers. Containers allow a developer to bundle up an application with all the parts it needs, such as Python and system dependencies, and ship it all out as one package. This makes it easy to ensure that the application will run on any other Linux machine regardless of any customized settings that the machine might have that could differ from the machine used for development.
We kept saying Docker is based on containers, but what are containers? Containers are lightweight, portable units that encapsulate an application's code, dependencies, and configurations, ensuring it runs consistently across different computing environments. This might sound similar to virtual machines at first, but containers are more lightweight and portable. This is because they virtualize the operating system level as opposed to the hardware level. Docker containers achieve this by using the host operating system's kernel and isolating the application processes from the host system. Since they share the same kernel, they are much more lightweight, and they start up in seconds, as opposed to minutes for virtual machines. This means that containers are more efficient and portable than virtual machines. Docker is the most popular containerization platform and it is widely used in the industry. It is open-source and it is available for all major operating systems.
How does Docker work? Let's first introduce the key concepts necessary to understand Docker:
- Docker Engine: The Docker Engine is a client-server application with these major components:
- A server which is a daemon process
- A REST API that specifies interfaces that programs can use to talk to the daemon and instruct it what to do
- A command line interface (CLI) client
- Images: An image is a lightweight, standalone, and executable software package that includes everything needed to run a piece of software, including the code, a runtime, libraries, environment variables, and config files. Images are used to create containers. You can think of an image as a Ubuntu or CentOS ISO file that you download to install an operating system on your computer.
- Containers: A container is a runtime instance of an image. It runs completely isolated from the host environment by default, only accessing host resources through the Docker engine. Containers are created from images and they can be started, stopped, moved, and deleted. They are the running instances of images. You can think of a container as a running instance of an Ubuntu or CentOS operating system that you installed from the ISO file.
- Dockerfile: A Dockerfile is a text document that contains successive commands a user wants to execute in the command line to build an image.
How Docker Build Works
During the Docker image build process which is initiated with docker build in a directory that contains the Dockerfile, the Docker Engine reads the Dockerfile and executes the commands in the order they are written. With each command, the Docker Engine creates a new "layer", which is a key feature of Docker. It allows for the reuse of layers from other images, which can make the build process very fast. Dockerfiles have a simple DSL (domain-specific language) that allows you to automate the steps you would normally manually take to create an image.
A sample Dockerfile looks like this:
# Use Python runtime as the parent image
FROM python:3.8-slim

# Set the working directory inside the container
WORKDIR /usr/src/app

# Copy the contents of the current directory in the host machine into WORKDIR of the container
COPY . .

# Install the packages listed in requirements.txt
RUN pip install --no-cache-dir -r requirements.txt

# Make port 80 available to outside
EXPOSE 80

# Definition of an environment variable
ENV NAME World

# Run app.py when the container launches
CMD ["python", "./app.py"]
Here we are saying that we want to use the official Python 3.8 slim image as the base image, that is, a starting point for our new image. (If we do not want our image to be based on another image, we would start with FROM scratch). Then we set the working directory in the container to /usr/src/app. Then we COPY the current directory contents on the host machine to the container's /usr/src/app directory. Then we can RUN any command we want, here we are installing the packages specified in requirements.txt. Then we EXPOSE port 80, which declares that the container listens on the specified network ports at runtime. Then we define an environment variable ENV NAME World. Then we specify the command to run when the container starts: CMD ["python", "./app.py"] assuming app.py is present in WORKDIR. This is a super simple example for demonstration purposes which does not cover all Dockerfile commands. A full list of Dockerfile commands can be found here.
Cog
Cog is an open-source tool developed by Replicate that is designed to rapidly build production-ready containers for your machine learning models. If you have ever tried to deploy a machine learning model, you know that it can be painful particularly when the model is developed/tested in one machine but is deployed on another. You have to worry about compatibility between CUDA and python packages, and you have to make sure that your model is loaded only once, and that it's loaded in the right place. You also need to install an application server such as uvicorn and write a web server code to serve the model. Cog takes care of all of this for you. It is built on top of Docker and it is designed to make it easy to build and deploy machine learning models. It is based on Docker, but you do not even need to know Docker in-depth to use Cog. You do not need to write a Dockerfile, you just need to write a simple configuration file in yaml format. Cog will then take care of the rest.
It is open-source and it is available for all major operating systems: macOS, Windows 11 with WSL2, and Linux.
In summary, Cog claims to provide the following benefits in addition to the benefits of Docker:
- No need to master Docker: Cog abstracts away the complexity of Docker, so you can focus on your model.
- No need to worry about CUDA compatibility: Cog ensures that your model runs on the right CUDA version.
- No need to worry about a server: Cog automatically sets up a server based on uvicorn and FastAPI for you, providing a RESTful HTTP API for your model.
- No need to worry about job queueing: Cog automatically sets up a job queue for you, so you can run multiple inferences in parallel.
Building a Docker Image with Cog
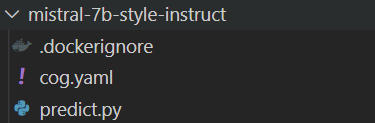
Given that you have Cog installed and you have a model that you want to deploy, you can build a Docker image with Cog in a few simple steps. First, you need to run cog init in a directory that contains your code and model. This will create a cog.yaml file, a predict.py file, and a .dockerignore file:
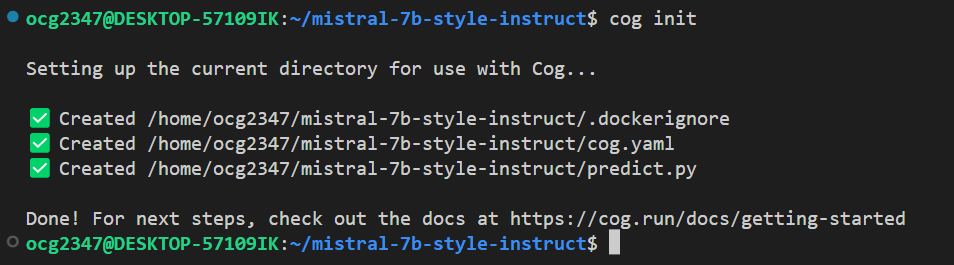
The cog.yaml file is a configuration file in yaml format that specifies the environment and the model. An example cog.yaml file looks like this:
build:
  gpu: true
  system_packages:
    - "libgl1-mesa-glx"
    - "libglib2.0-0"
  python_version: "3.11"
  python_packages:
    - "torch==1.8.1"
  run:
    - "echo 'Hello, world!'"
predict: "predict.py:Predictor"
Here, by setting gpu to true, we are specifying that we want GPU support for our model serving. So Cog will make sure for us that the base docker image has the right CUDA version. Next, we declared the system packages that we needed to install on top of the base image. Then we specified the Python version and the Python packages that we needed to install. Internally, cog will create a requirements.txt that we all know from Python development and install it with pip install -r requirements.txt. Next, we told cog that we wanted to run echo 'Hello, world!' during the last step of the build process. You can chain multiple commands here. Under the hood, Cog will create and run these commands with RUN commands in a Dockerfile. Finally, we specified the predict.py file and the class that contains the model loading and inference code.
The predict.py file is a Python file that contains a class that inherits from cog.Predictor. This class should have a setup method that loads the model and a predict method that takes input and returns output. You can then modify these files to fit your needs. A sample predict.py file looks like this:
from cog import BasePredictor, Input, Path
import torch

class Predictor(BasePredictor):
    def setup(self):
        self.model = torch.load("./weights.pth")
    def predict(self,
          prompt: str = Input(description="Question")
    ) -> str:
        answer = self.model(prompt)
        return answer
Cog will call its setup method only once during the last step of the build process and its predict method whenever an API request is made. While it is not mandatory, it is best practice to keep model loading contained within setup to decrease API latency. You can add other methods to the Predictor class as you like but you must follow the setup , and predict method signatures!
AWS EC2
Amazon Elastic Compute Cloud (Amazon EC2) is a web service that provides a computing environment in the cloud. By using Amazon EC2, you rent virtual machines, also known as "instances". You have complete control of your instances, including root access and the ability to interact with them as you would with any machine. You can use Amazon EC2 to launch as many or as few virtual servers as you need, configure security and networking, and manage storage. You can also create a scalable configuration based on EC2 to handle varying workloads. You can opt for different pricing models such as On-Demand, Reserved, and Spot instances. It can be easily integrated with other AWS services such as Amazon S3, Amazon RDS, Amazon VPC and many more.
Deployment Process
Build and Test the Docker Image Locally
Prerequisites:
- Nvidia GPU with CUDA support
- Nvidia Container Toolkit installed on your local machine
- Docker installed on your local machine
- Cog installed on your local machine
First, let's create an empty folder named "mistral-7b-style-instruct" and navigate to it in your terminal. Then let's simply run cog init in this directory. This will create a cog.yaml file, a predict.py file, and a .dockerignore file. Then let's modify the cog.yaml file to look like this:
build:
  gpu: true
  python_version: "3.9"
  python_packages:
    - transformers==4.35.0
    - torch==2.1.0
    - peft==0.4.0
    - bitsandbytes==0.41.1
    - accelerate==0.21.0
    - scipy
predict: "predict.py:Predictor"
We declared that we want GPU support for our model serving. And we imposed that we want to use Python 3.9 and we want to install the packages specified in the python_packages list. Necessary packages and their versions are adapted from the requirements.txt file of the instruct-finetune-mistral that we used in the previous post. We did not include all packages since certain packages are necessary only for training but not for inference. Then we specified the predict.py file and the class that contains the model loading and inference code.
Then let's modify the predict.py file. First, we need to import the necessary packages:
from cog import BasePredictor, Input
import torch
from peft import AutoPeftModelForCausalLM
from transformers import AutoTokenizer
Then we need to modify the Predictor class. Let's first modify the setup method first so that the model is loaded into memory once during the start of the container runtime and then we can run multiple predictions without the burden of loading the model again and again. These model and tokenizer initializations are adapted from the previous post:
def setup(self) -> None:
    """Load the model into memory to make running multiple predictions efficient"""
    # load base LLM model, LoRA params and tokenizer
    self.model = AutoPeftModelForCausalLM.from_pretrained(
        "neuralwork/mistral-7b-style-instruct",
        low_cpu_mem_usage=True,
        torch_dtype=torch.float16,
        load_in_4bit=True,
    )
    self.tokenizer = AutoTokenizer.from_pretrained(
        "neuralwork/mistral-7b-style-instruct",
    )
Then we need to modify the predict method where the inference will take place. We will adapt the sample inference script:
def predict(
    self,
    prompt: str = Input(description="Self description of your body type and personal style"),
    event: str = Input(description="Event description"),
) -> str:
    """Run a single prediction on the model"""
    prompt = self.format_instruction(prompt, event)

    input_ids = self.tokenizer(prompt, return_tensors="pt", truncation=True).input_ids.cuda()

    # inference
    with torch.inference_mode():
        outputs = self.model.generate(
            input_ids=input_ids,
            max_new_tokens=800,
            do_sample=True,
            top_p=0.9,
            temperature=0.9
        )

    # decode output tokens and strip response
    outputs = outputs.detach().cpu().numpy()
    outputs = self.tokenizer.batch_decode(outputs, skip_special_tokens=True)
    output = outputs[0][len(prompt):]

    return output
Here we first format the input prompt and event description into a single string. We then tokenize the input and perform inference. Then we decode the output tokens, strip, and return the response of our lovely stylist.
Note that we defined the parameters of this method using the Input class from cog together with their types. You can define the allowed values or default values for these parameters as well. You can check the types that cog supports and whole API here. We also had to declare the output type of the method, which is string in this case.
Now we are done with developing the Predictor class, so we can build the Docker image with Cog. To do this, simply run cog build in this directory. This will take some while so it is a good time to grab a cup of coffee ☕. If you see the message "Image build as cog-mistral-7b-style-instruct", that means you have successfully built the Docker image. You can see the docker images in your machine by running docker images in your terminal. You should see the mistral-7b-style-instruct image in the list!

Now we can test the image locally. To do this first initialize a container from the image by running the following command in your terminal:
docker run -p 8000:8000 --gpus all mistral-7b-style-instruct
Here we say that forward port 8000 in the host machine to port 8000 of the container, use gpus, and run a container using mistral-7b-style-instruct image. Wait for the container to start the server and wait for a bit more until Predictor class is instantiated which includes downloading the weights. Then you can test the server by sending a POST request to http://localhost:5000/predictions with the following body:
{
    "input": {
        "prompt": "I'm an athletic and 171cm tall woman in my mid twenties, I have a rectangle shaped body with slightly broad shoulders and have a sleek, casual style. I usually prefer darker colors.",
        "event": "business meeting",
    }
}
Let's implement this in a Python file 'test.py' with the requests library:
import requests
import json

url = "http://localhost:5000/predictions"
data = json.dumps(
    {
        "input": {
            "prompt": "I'm an athletic and 171cm tall woman in my mid twenties, \
                I have a rectangle shaped body with slightly broad shoulders and have a sleek,\
                casual style. I usually prefer darker colors.",
            "event": "business meeting",
        }
    }
)

response = requests.post(url, data=data)
print(response.json())
If you run this code in a separate terminal you should see the response of the server. You should see a JSON response with the following structure:
{
  "input": {
    "prompt": "I'm an athletic and 171cm tall woman in my mid twenties, I have a rectangle shaped body with slightly broad shoulders and have a sleek, casual style. I usually prefer darker colors.",
    "event": "business meeting"
  },
    "output": "1. Outfit combination:\n- Top: A fitted black bla...",
    "id": null,
    "version": null,
    "created_at": null,
    "started_at": "2024-02-10T08:23:01.868070+00:00",
    "completed_at": "2024-02-10T08:24:26.307042+00:00",
    "logs": "The attention mask ..."
    "error": null,
    "status": "succeeded",
    "metrics": {
        "predict_time": 84.438972
    },
      "webhook": null,
      "webhook_events_filter": [
        "start",
        "output",
        "logs",
        "completed"
      ],
      "output_file_prefix": null
}
If you see a response like this, with the "output" key holding the response of our lovely stylist, congratulations! You have successfully built and tested the Docker image locally. Now we can move on to the deployment on an AWS EC2 instance.
Deploy the Model on an AWS EC2 Instance
Prerequisites:
- An AWS account with a quota for launching EC2 instances with GPU support
So far, we got our Docker image ready and tested it locally. Now we will deploy it on an AWS EC2 instance. First, we need to launch an EC2 instance. To do this, first log in to your AWS account and navigate to the EC2 dashboard. Then click on "Launch Instance". Name your instance, and select Amazon Machine Image (AMI). We named it "mistral-7b-style-instruct" and chose the Ubuntu Server 22.04 LTS AMI:
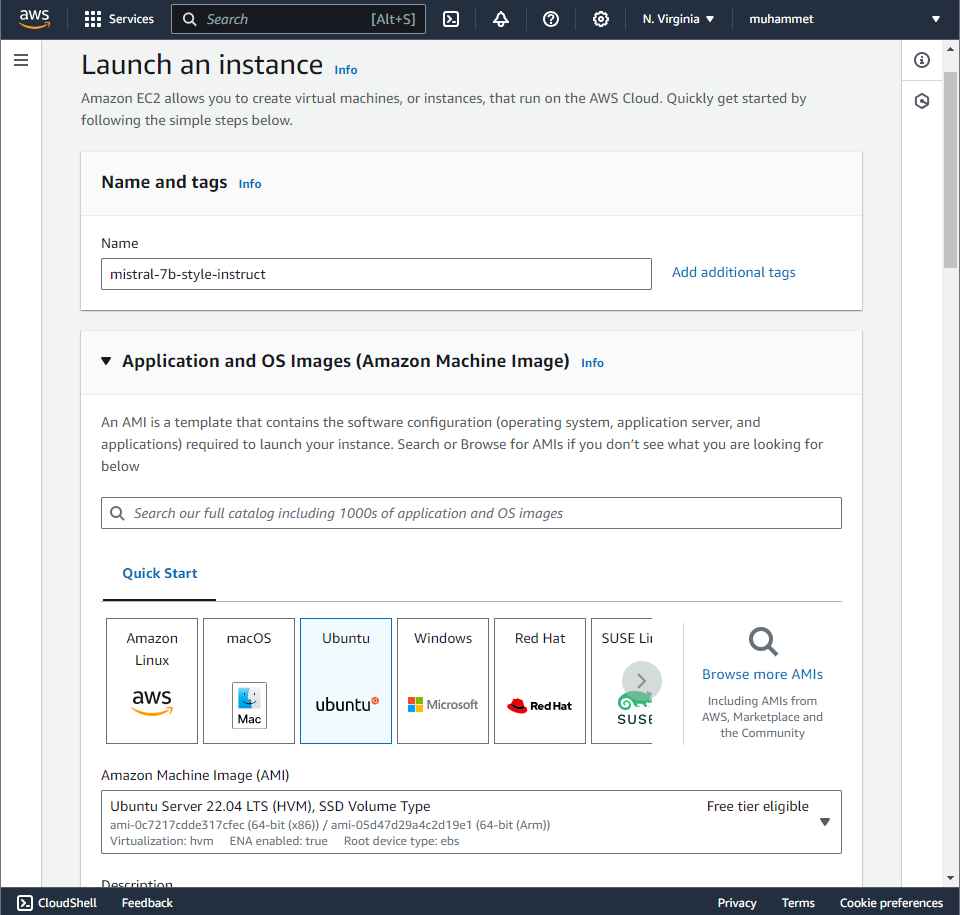
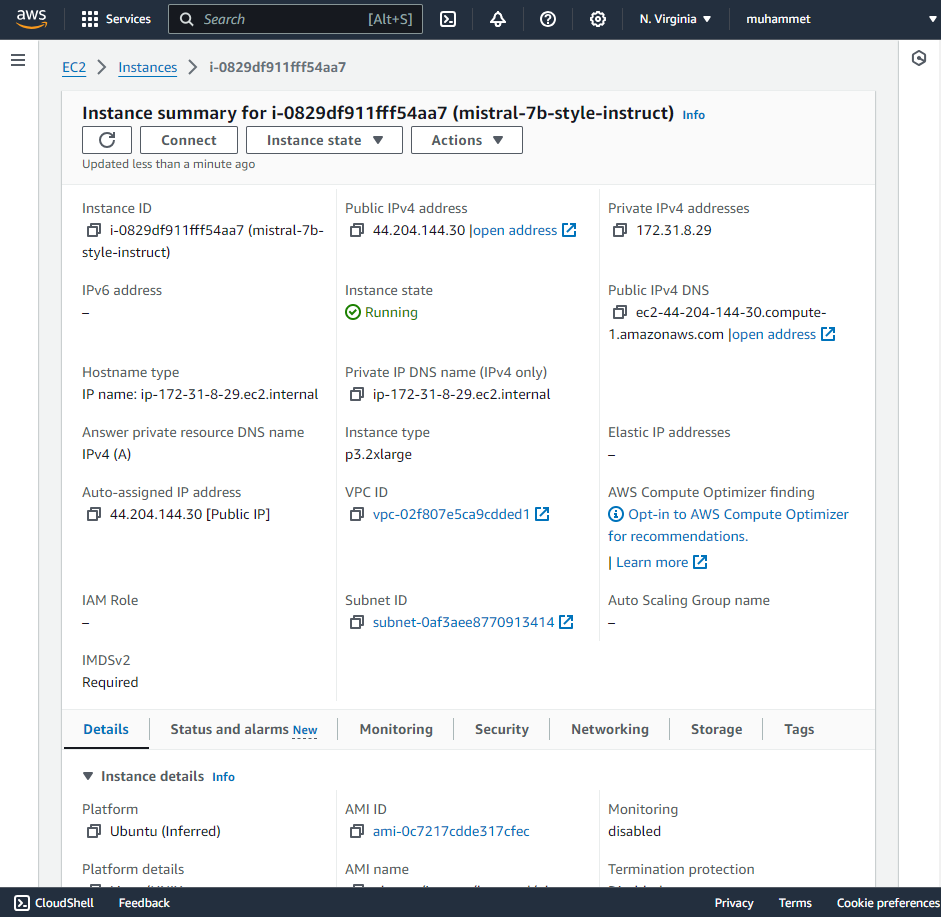
Then select an instance type. We chose p3.2xlarge which has 1 Tesla V100 GPU, 8 vCPUs, and 61 GiB memory.

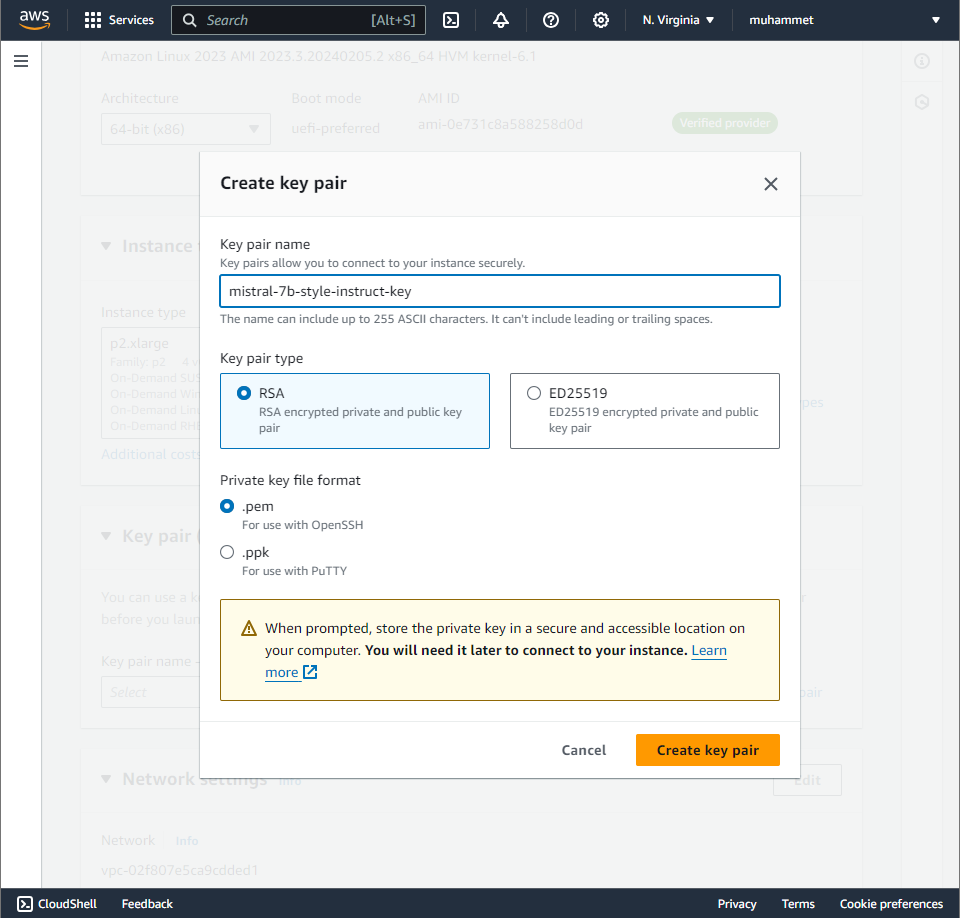
We are creating a key pair for this task to authenticate with the instance when we want to connect to it using SSH. It will download a .pem file immediately after creation which you should keep in a safe spot 😊.
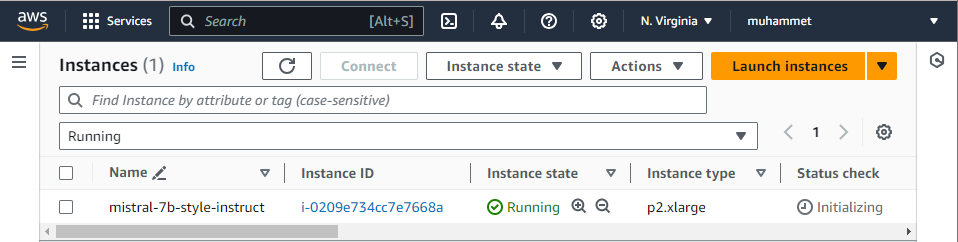
Then we launched the instance by hitting the "Launch Instance" after setting the volume size to 50GiG, keeping the default settings for the rest of the steps. In a short while your instance will be up and running:
Now we need to connect to the instance. We have two options to do this: using the AWS Management Console or using the terminal. We will use the terminal. First, navigate to the directory where the .pem file that was downloaded is located and run the following command in your terminal:
chmod 400 your-key-pair.pem
We also need an instance's public IP address to connect to it. You can find it in the EC2 dashboard, it is denoted as "Public IPv4 address". Now let's add this host to our ~/.ssh/config file so that we can connect to it easily. Open the ~/.ssh/config file in your favorite text editor and add the following lines:
Host mistral-7b-style-instruct-ec2
    HostName public-ipv4-address-of-your-instance
    User ubuntu
    IdentityFile /path/to/your-key-pair.pem
You can use the terminal to connect to the instance. For this, run the following command in your terminal:
ssh mistral-7b-style-instruct-ec2
However, we strongly recommend you use an IDE like PyCharm or VSCode to connect to the instance for easy file transfer and terminal access. We used VSCode and Remote-SSH plugin. After connecting to the instance, you can see the instance's terminal in your IDE. Open the home/ubuntu directory by typing Ctrl+K+O and selecting the corresponding path. Then you can transfer the Docker image to the instance by dragging and dropping it to the directory. Then you can open a terminal in the IDE and navigate to the directory where the Docker image is located. Then you can run the following command in the terminal to load the Docker image to the instance:
Setting up the Environment on the EC2 Instance
Now we can build the Docker image on the instance. First let's install Nvidia Driver, Docker, Nvidia Container Toolkit, and Cog on the instance:
- Install Nvidia Driver with the following commands and then reboot the instance:
sudo apt update && sudo apt upgrade -y # update and upgrade the system
sudo apt install ubuntu-drivers-common # install ubuntu drivers tool
sudo add-apt-repository ppa:graphics-drivers/ppa # add the graphics drivers repository
sudo apt update # update the repository
sudo ubuntu-drivers autoinstall # install the recommended driver automatically
- Install Docker as described here. To use docker commands without sudo follow the instructions here.
- Install the Nvidia Container Toolkit as described here. Then restart the Docker service with:
sudo systemctl restart docker
- Install the latest version of Cog with the following command in the terminal:
sudo curl -o /usr/local/bin/cog -L "https://github.com/replicate/cog/releases/latest/download/cog_$(uname -s)_$(uname -m)"
sudo chmod +x /usr/local/bin/cog
Building and Testing the Docker Container on the EC2 Instance
Now we can copy the 'mistral-7b-style-instruct' directory to the instance and navigate to it in the terminal. Then we can run the following command in the terminal to build the Docker image on the instance:
cog build
Then we can repeat the same steps to test the image locally on the instance. First, initialize a container from the image by running the following command in the terminal:
docker run -p 5000:5000 --gpus all mistral-7b-style-instruct
Then you can test the server by running 'test.py' in the terminal. If you see the response, congratulations! You have successfully built and tested the Docker image on the instance! To test the server from outside the instance, you can send a POST request to the server by slightly modifying the 'test.py' file in your local machine:
import requests
import json

url = "http://${IP_ADDRESS_OF_YOUR_INSTANCE}:5000/predictions"
data = json.dumps(
    {
        "input": {
            "prompt": "I'm an athletic and 171cm tall woman in my mid twenties, \
                I have a rectangle shaped body with slightly broad shoulders and have a sleek,\
                casual style. I usually prefer darker colors.",
            "event": "business meeting",
        }
    }
)

response = requests.post(url, data=data)

print(response.json())
If you see the response, congratulations! You have successfully deployed your fine-tuned Mistral-7B model on an AWS EC2 instance! 🎉 However we are pretty sure that your client would wait so long but cog server does not even get the request and you end up getting a timeout error. The reason that the request is not even delivered is the security precautions predetermined for us. Let's click on the "Instance ID" of our EC2 instance in the EC2 Console:
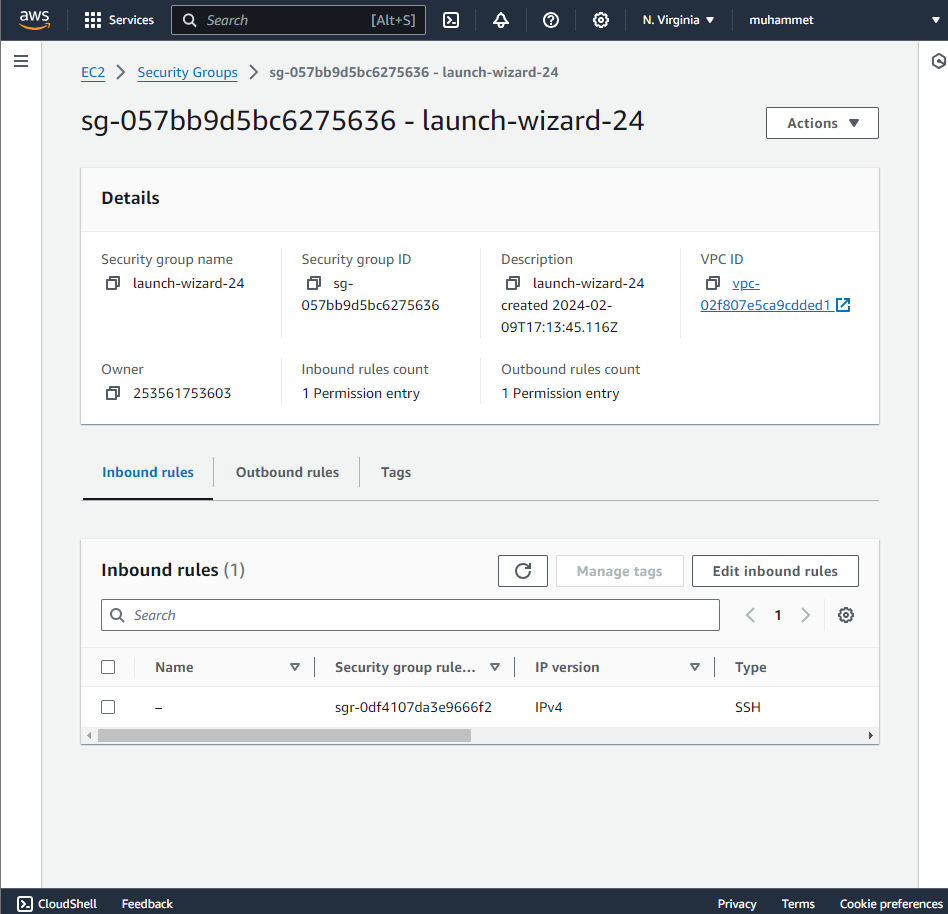
Now let's click on the "Security" tab and then click on the security group of the instance:
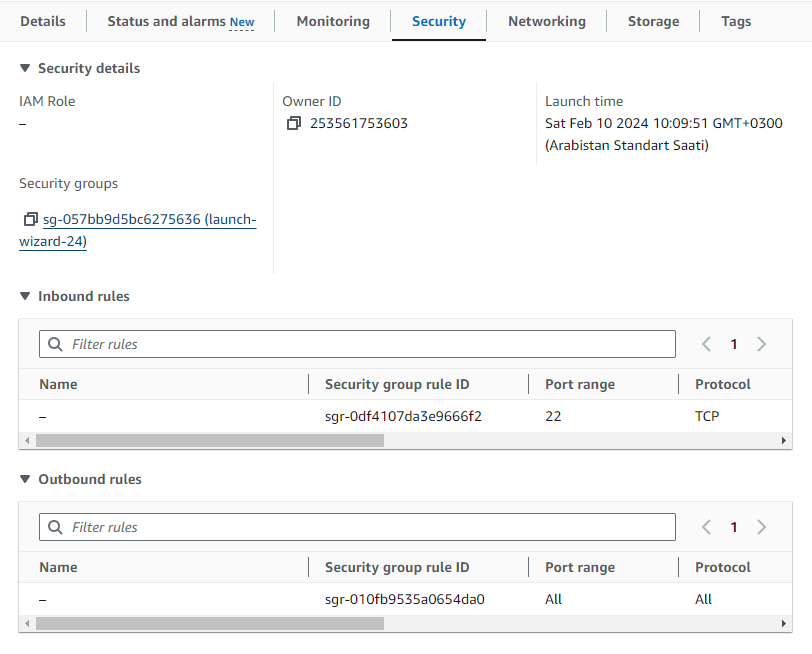
Then click on the "Inbound rules" tab and then click on the "Edit inbound rules" button:
Then click on the "Add rule" button and add a rule with the following settings:
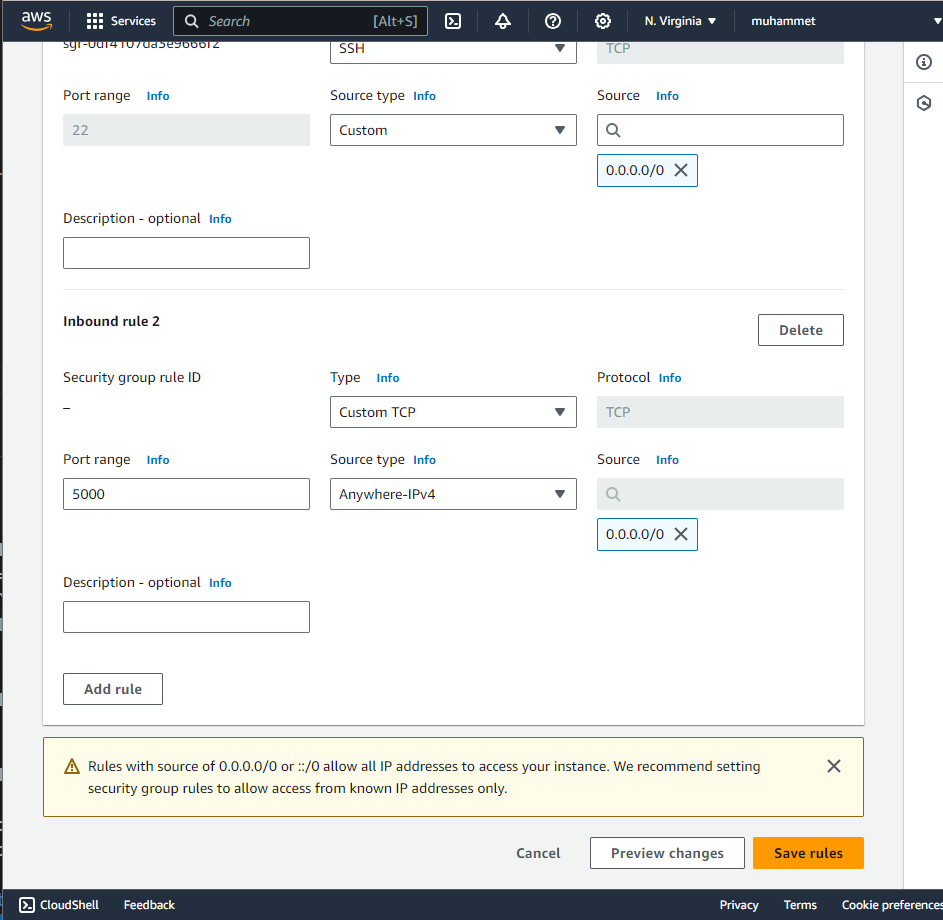
Then click on the "Save rules" button. Now you can test the server from outside the instance by sending a POST request to the server. If you see the response, congratulations! You have successfully deployed your fine-tuned Mistral-7B model on an AWS EC2 instance and tested it from outside the instance! 🎉 You might have noticed that if you close the terminal on which a docker container is running, the container is killed and your inference server is not up anymore. To have the container run in the background, you just run it with the "-d" argument like:
docker run -d -p 5000:5000 --gpus all mistral-7b-style-instruct
Now you can close the terminal, close the SSH connection, and still get cool style recommendations from the server! :) Cheers!
Conclusion
In this post, we've walked through the steps to prepare, containerize, and deploy a machine learning model —as Mistral-7b-style-instruct that we developed in our previous blog— onto an AWS EC2 instance using Docker and Cog. This process is crucial for moving a model from a development environment to a more accessible and usable state, bypassing the common hurdles associated with technical configurations and compatibility issues. By leveraging Cog, we aimed to make developing and containerization of an inference server way easier. Docker's role in creating isolated environments guarantees that our deployment is consistent and manageable across different computing environments.
To stay tuned for in-depth tutorials and technical blog posts, follow us on Twitter: @DevMHat, @neuralwork, and LinkedIn.
Helpful Links
- How Docker Build Command Works Internally by Ivan Velichko:
https://iximiuz.com/en/posts/you-need-containers-to-build-an-image/ - What is Amazon EC2: https://docs.aws.amazon.com/AWSEC2/latest/UserGuide/concepts.html
- Cog documentation:
https://github.com/replicate/cog/blob/main/docs/getting-started.md