Deploying an ML Model on Google Compute Engine

Introduction
Deploying and maintaining machine learning models as a web service can be expensive and tricky. I’ve recently started using Compute Engine for my projects and found that Google Cloud, very much like AWS, has a rather steep learning curve. In this post, I will be discussing how to deploy an object detection model as an API with Flask on Google Compute Engine.
The accompanying code for this tutorial can be found here.
What you’ll learn in this tutorial:
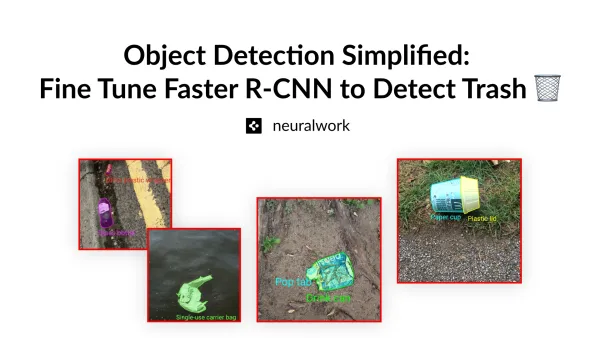
- Using a pre-trained object detection model to detect and annotate various objects within images.
- Building a simple Flask API that receives images through POST requests and serves the predicted labels, bounding box coordinates, box colors and confidence levels of detected objects.
- Setting up a Google Cloud project and configuring a Compute Engine instance.
- Installing and setting up a virtual environment with Miniconda.
- Deploying a Flask app and setting up a stable production server that can handle a high number of requests with NGINX and Gunicorn.

Requirements: Basic knowledge of object detection, Flask and a Google Cloud account with billing enabled.
Note: Google Cloud has a free tier program that offers 300$ in credits for new users.
App Engine vs Compute Engine
App Engine and Compute Engine are two of the Google Cloud products you can use to deploy ML models. The main difference between the two services is Compute Engine is an Infrastructure-as-a-Service (IaaS) whereas App Engine is a Platform-as-a-Service (PaaS) built on top of Compute Engine.
This basically means that Compute Engine is a bare-bones service whereas App Engine provides extra services to make deploying, maintaining and scaling web apps easier, albeit at a higher cost per hour. The good thing about App Engine is it automatically scales up or down based on the volume of incoming requests and allows you to focus on apps, rather than system administration. However, it’s cheaper to keep a Compute Engine instance running if you have a constant load of API requests.

Object Detector Project Structure
I won’t be going into the details of the object detection code in this tutorial. The code I will be using is an edited version of Adrian Rosebrock’s excellent tutorial on YOLO Object Detection with Open CV and can be found here. We’ll be using the YOLOv3 model trained on the COCO dataset, a large-scale object detection, segmentation, and captioning dataset that contains 330K images in 80 object categories.
.
├── yolo-coco              # Pre-trained model files
    └── coco.names         # Object labels (person, car, etc.)
    └── yolov3.cfg         # Model configuration
    └── yolov3.weights     # Model weights
├── app.py                 # Flask app serving predictions
├── yolo.py                # Functions to generate predictions
├── requirements.txt       # Dependencies
└── README.md
The two main functions in yolo.py are download_model_weights and get_predictions, which expects a single encoded image as input. The get_predictions function processes the encoded input image, loads and runs the model and returns the box coordinates, box display color, label and confidence level for each detected object. The model weights are automatically downloaded the first time you run the app locally or on GCE.
The Flask API
Our Flask app sits in app.py and has a single endpoint /predict. On a higher level, we want our app to:
- Be accessible by other computers (your customers!)
- Accept POST requests with encoded images at the endpoint /predict
- Call the object detection functions in yolo.py and return the predictions as the response
- Stay alive at all times and be capable of handling a high number of requests
from flask import Flask, jsonify, request
from yolo import get_predictions

app = Flask(__name__)

@app.route(“/predict”, methods=[‘POST’])
def predict():
   predictions = get_predictions(request)
   return jsonify(predictions)

if __name__ == “__main__”:
   app.run(host=’0.0.0.0', port=5000, debug=True)
Flask by default hosts the app on 127.0.0.1 which refers to the local IP address of your computer and only can be accessed by programs running on the same computer as your exposed server. Obviously, we need our app to be accessible outside the Compute Engine instance it will be deployed in. Changing the host address as 0.0.0.0 allows us to access the app from other computers using the the GCE instance’s external IP address.
Part 1: Setting up the Google Project and Compute Engine Instance
The first thing we need to is to create a project. You can either use an existing Google Cloud project or create a new one over here.
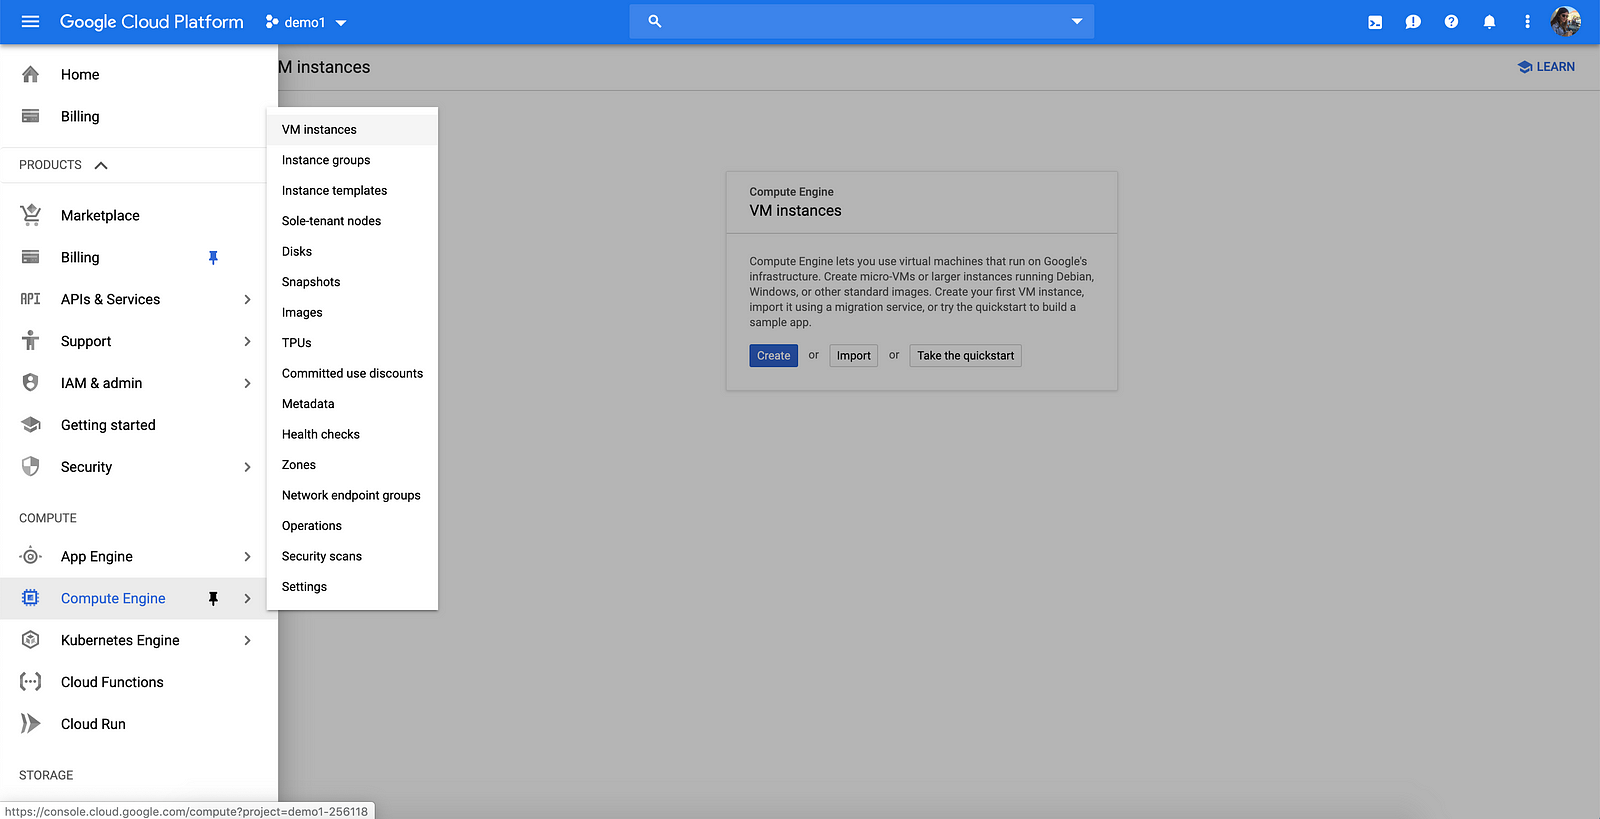
I named my project demo1 and Compute Engine instance flask-demo but the project and instance names can be anything you like. Once you created and/or selected a project, you can head over to Compute Engine > VM instances to create a new GCE instance.
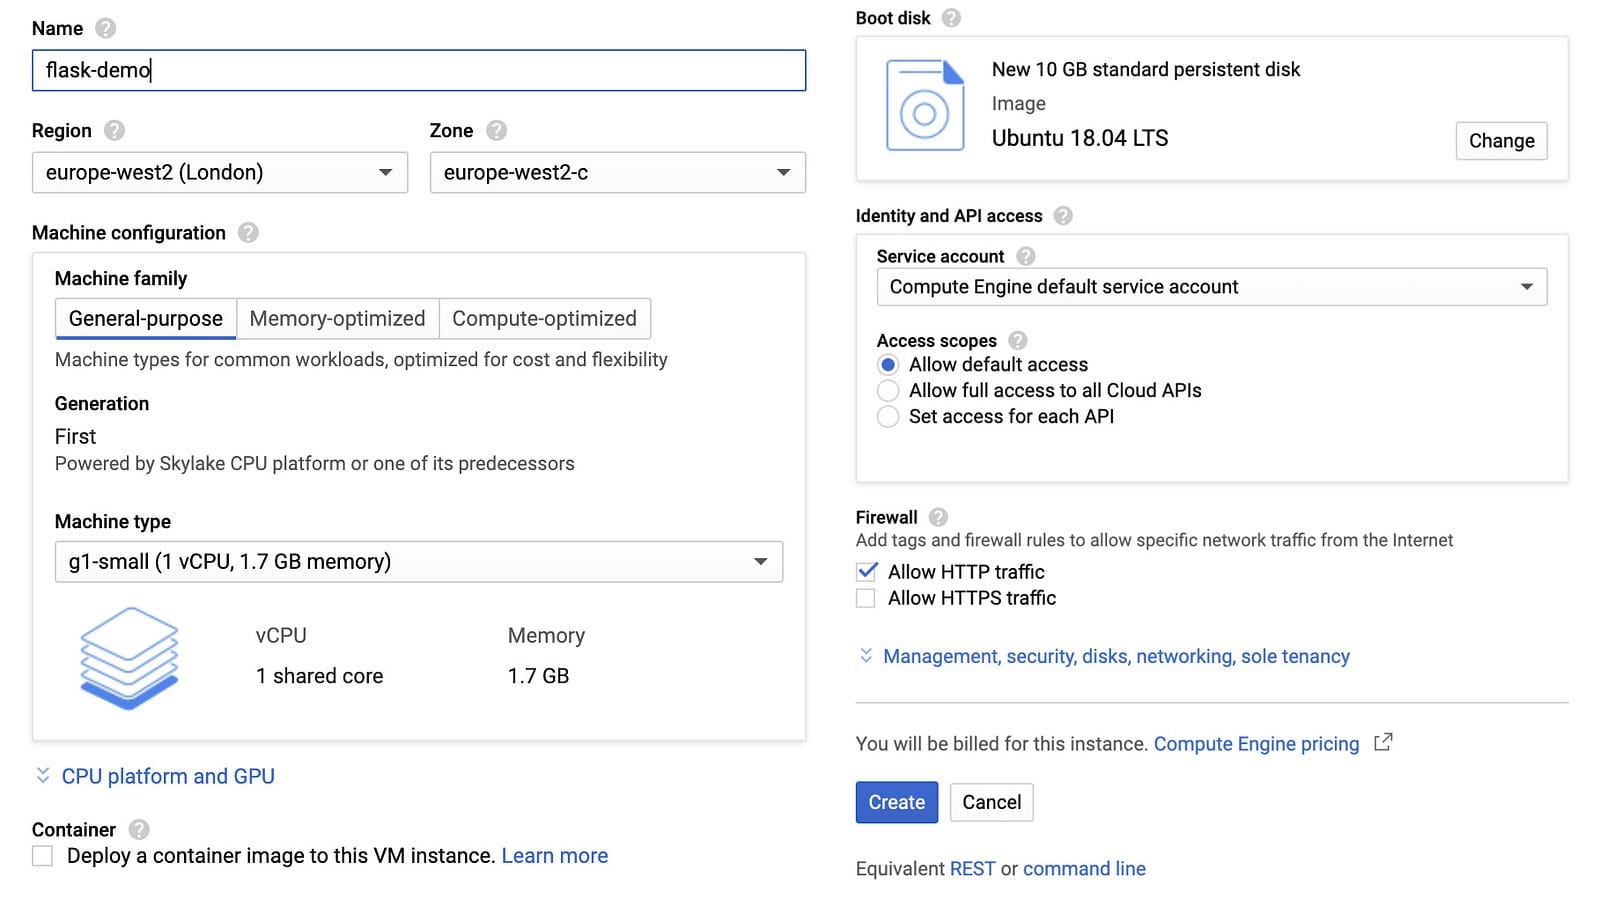
We can now configure our VM instance, I selected europe-west2 as the region but any region/zone will do for this tutorial. Compute Engine also allows you to change and customize the number of CPU cores, memory, GPUs, and boot disk.
To follow along the tutorial, select the g1-small (or a larger) instance, change the boot disk to Ubuntu 18.04 LTS and set the Firewall settings to allow HTTP traffic. Pricing might differ across regions but this particular configuration got me a monthly estimate cost of $17.04.
It might take a few minutes to boot up the VM instance once you click create.
We enabled HTTP traffic for our GCE instance but there is one more thing we need to do. Our Flask app will be running on port 5000 and Google Cloud, by default, doesn’t listen to port 5000. The default network in the project comes with default firewall rules “default-allow-http” and “default-allow-https” to allow traffic on port 80 and 443.
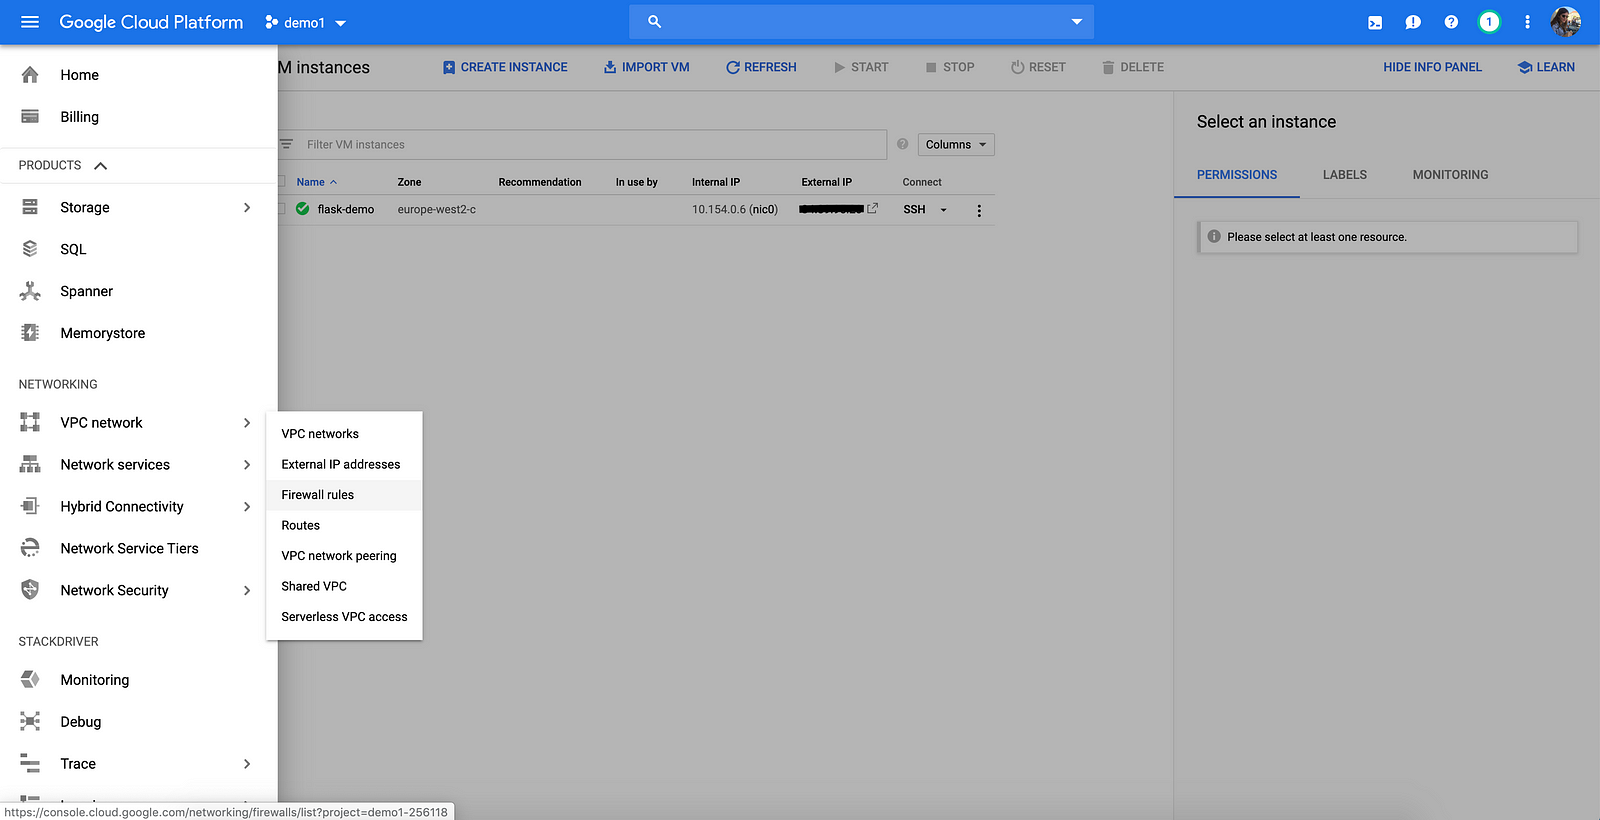
We need to head over to VPC network > Firewall rules and create a new firewall rule to accept incoming connections and requests on the port our app will be running on.
Click Create a firewall rule and configure the settings as shown below. Make sure to add http-server to target tags, 0.0.0.0/0 to source IP ranges and set 5000 as the specified port.

Part 2: Configuring the Compute Engine Instance
Time to configure our GCE instance! You can list your Compute Engine instances at Compute Engine > VM instances.
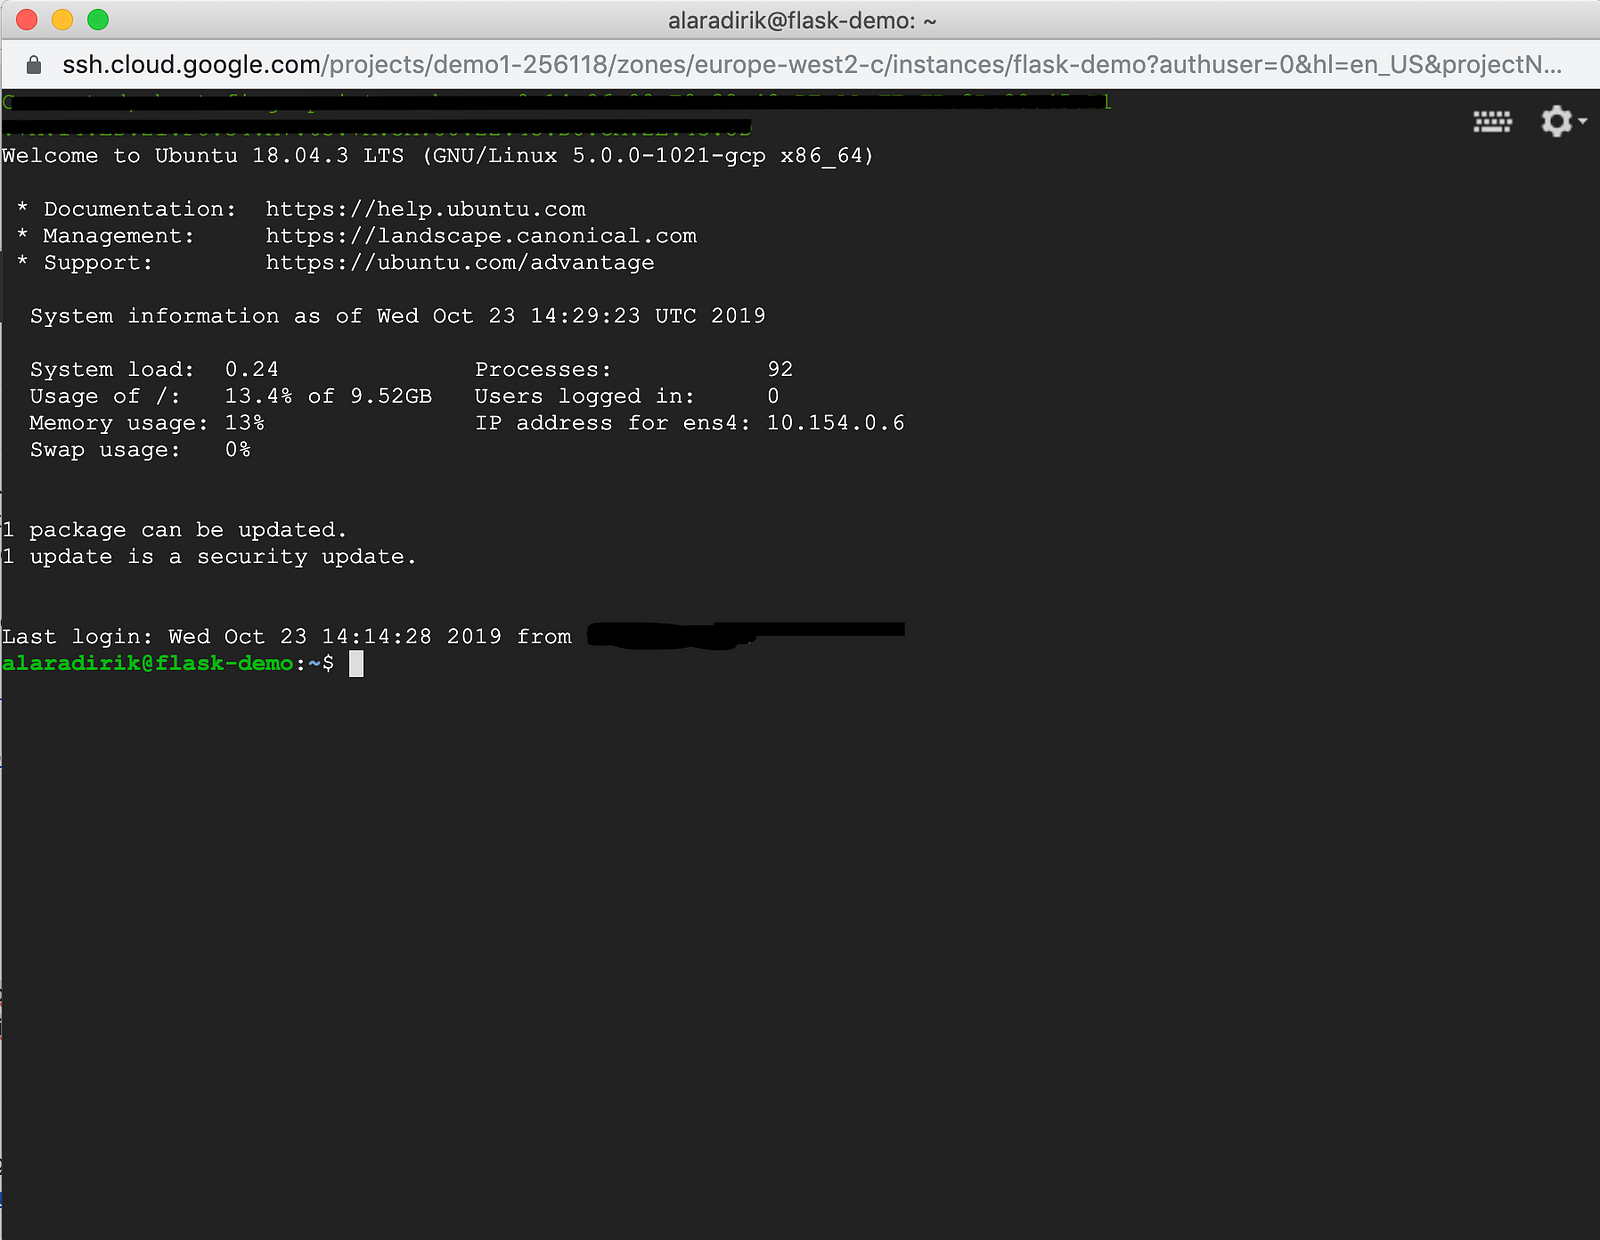
Make sure to note down the External IP address of your instance, you will need it to access your app and send API requests outside the GCE instance. Click the SSH button to login to the instance from your browser.

Note: Be careful when copying/pasting commands. Some characters might not transfer exactly as intended. If all else fails, write the command out manually.
We are now ready to setup our production environment. We will be using Miniconda to manage the dependencies and the environment. On your instance’s SSH terminal, run:
# update system packages and install the required packages
sudo apt-get update
sudo apt-get install bzip2 libxml2-dev libsm6 libxrender1 libfontconfig1

# clone the project repo
git clone https://github.com/alaradirik/google-cloud-flask-tutorial.git

# download and install miniconda
wget https://repo.anaconda.com/miniconda/Miniconda3-4.7.10-Linux-x86_64.sh
bash Miniconda3-4.7.10-Linux-x86_64.sh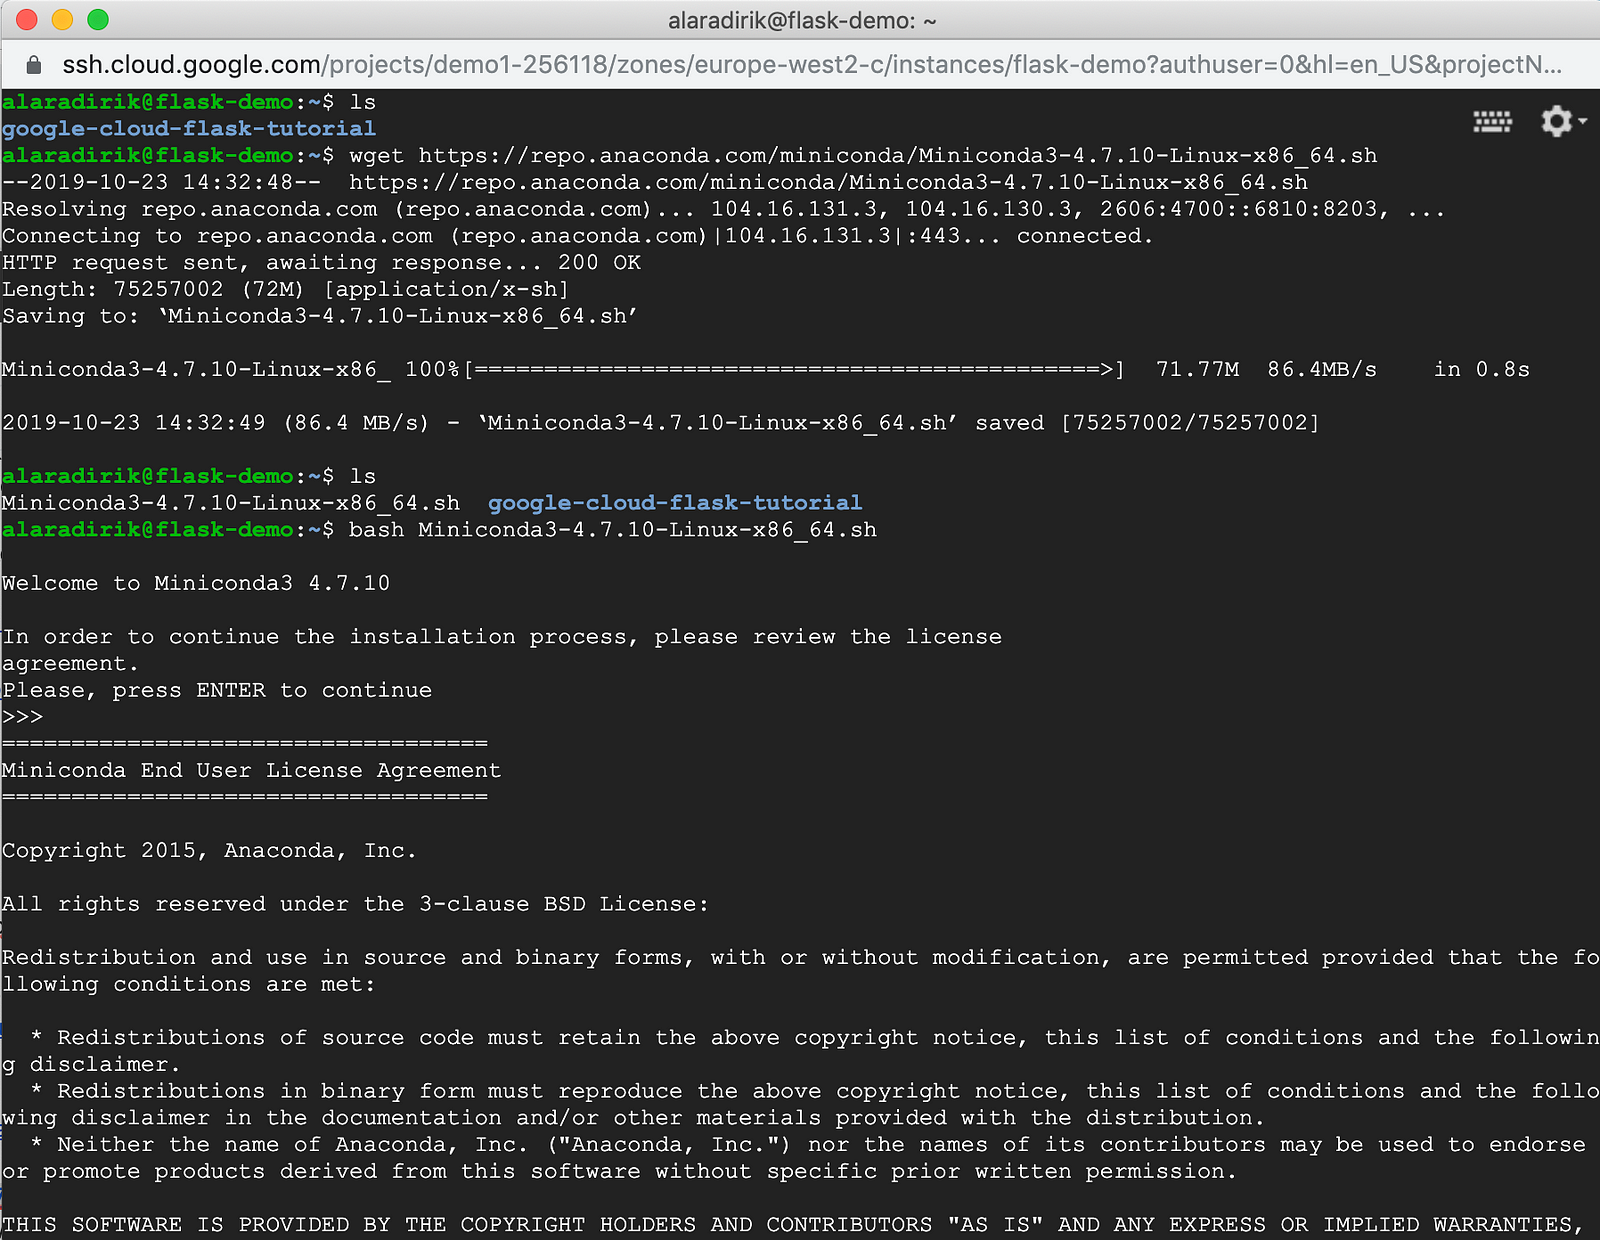
Follow the instructions and agree to the terms to install Miniconda. Keep the default installation location and answer “yes” to “Do you wish the installer to initialize Miniconda3 by running conda init?”.
Once installed, we will need to export the full path of Miniconda to make it executable by the conda command. We can then go ahead and create a new conda environment.
You might need to close and re-open the SSH terminal for changes to take effect after running conda init.
export PATH=/home/<your name here>/miniconda3/bin:$PATH
rm Miniconda3-4.7.10-Linux-x86_64.sh

# confirm installation
which conda

# create and activate a new environment
conda create -n flask-tutorial python=3.7
conda activate flask-tutorial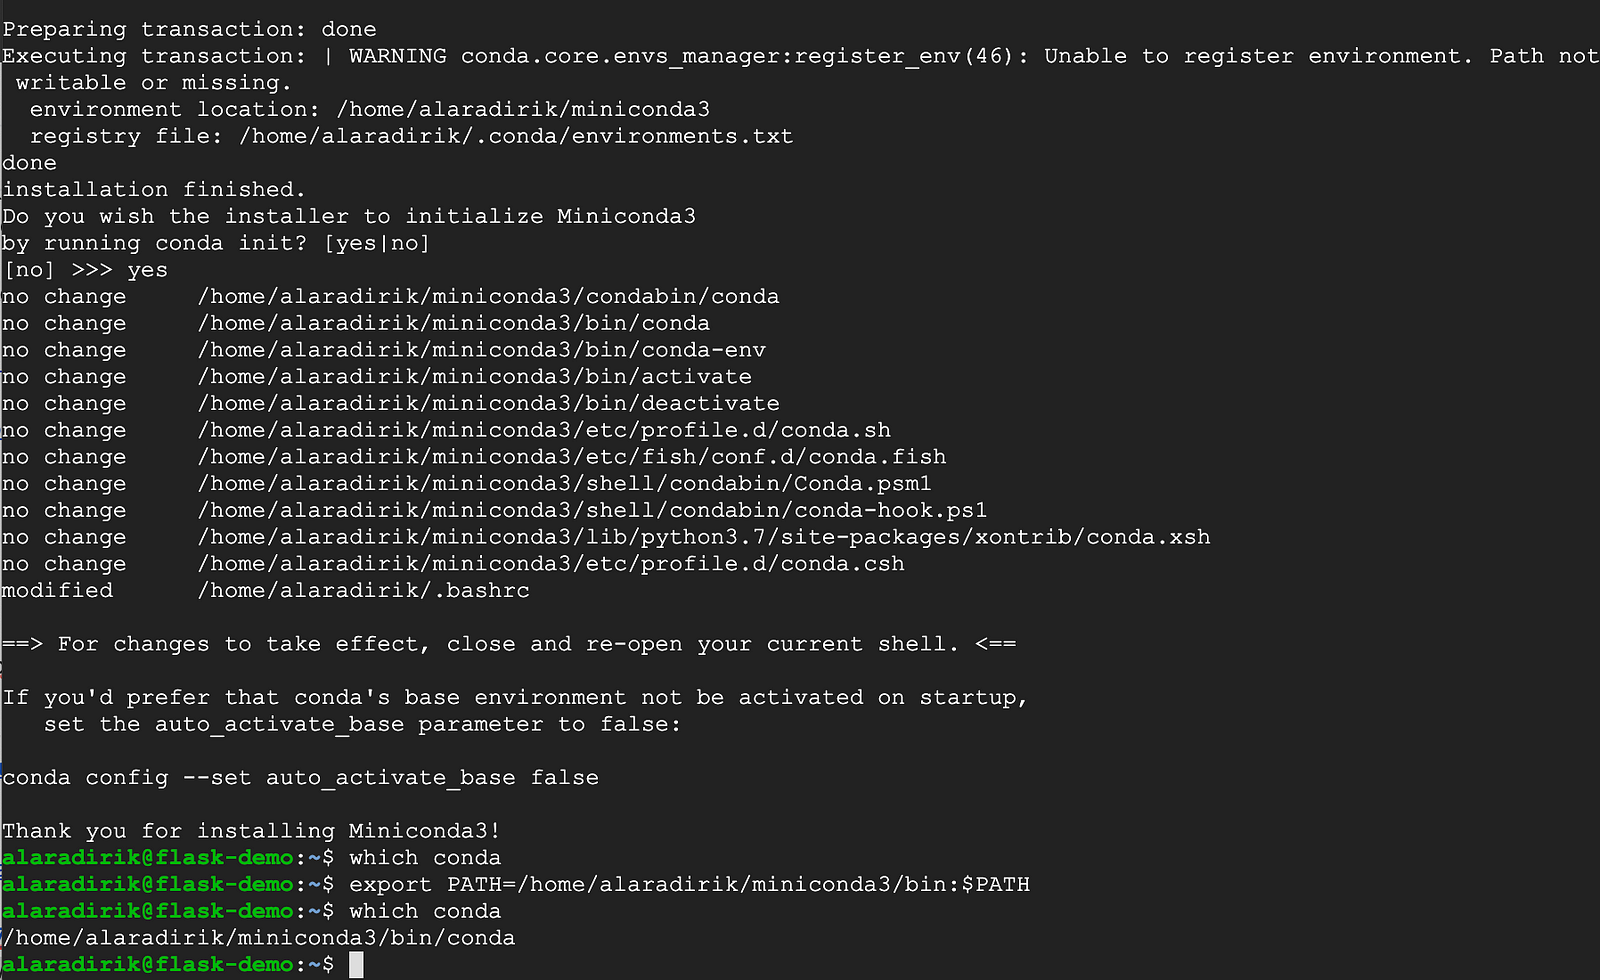
Part 3: Deploying and Testing the Flask App
Here is the fun part! We already installed Miniconda and cloned the project repo, the next thing we need to do is to install the project dependencies, start the app and make sure that it can receive requests from other computers.
# go to project root and install the requirements
cd google-cloud-flask-tutorial
pip install -r requirements.txt

# run the app
python app.py
You can test your app by sending a POST request from your local computer terminal to the API using the external IP address of instance. If you don’t have the external IP, head over to Compute Engine > VM instances to find it.
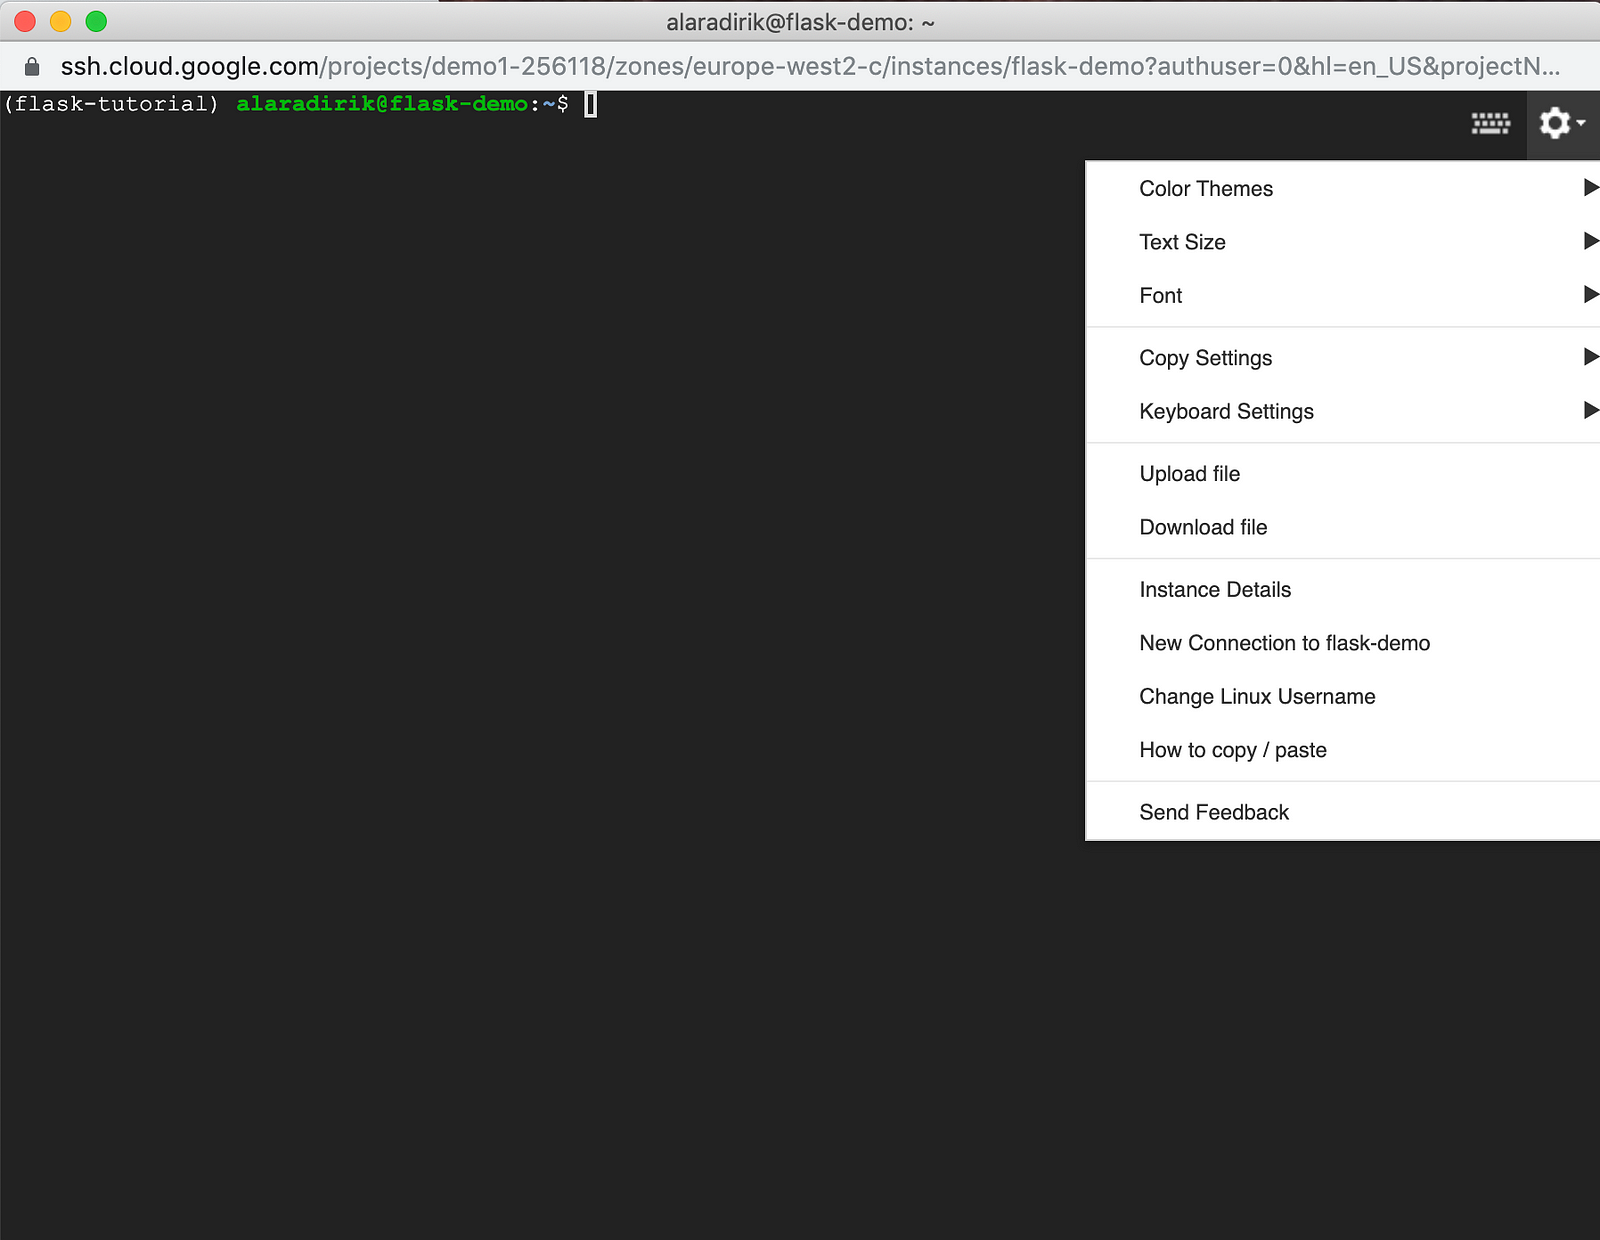
The project repo on Github includes a sample request script named request.py and an images folder containing sample images to test the app. You can either clone the repo to your local computer or download the files from the instance’s SSH terminal using the Settings > Download file button.
request.py sends an encoded image to the /predict endpoint of our API over a POST request to the instance. You should insert in the external IP of your instance into the url and create a virtual environment with the dependencies to execute request.py.
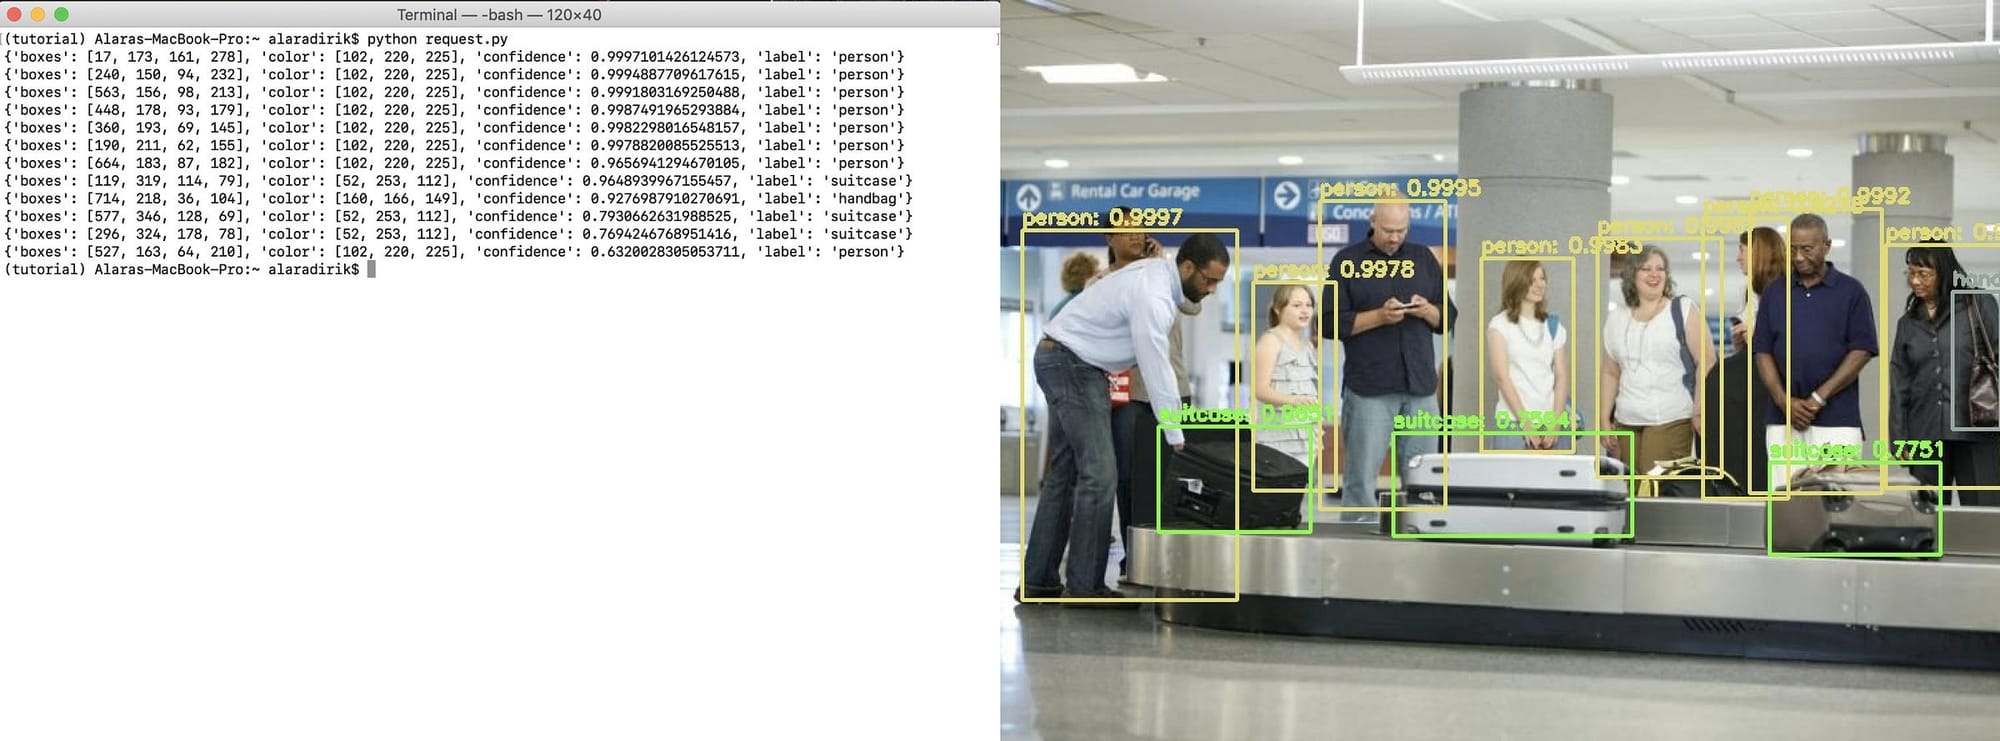
Our app sends the box coordinates, box display color, label and confidence level of each detected object as the response. request.py uses these values to create and save an annotated version of the image on the client side.
# request.py dependencies
import requests
import json
import cv2


url = "http://<external IP address>:5000/predict"
headers = {"content-type": "image/jpg"}

# encode image
image = cv2.imread('images/baggage_claim.jpg')
_, img_encoded = cv2.imencode(".jpg", image)

# send HTTP request to the server
response = requests.post(url, data=img_encoded.tostring(), headers=headers)
predictions = response.json()

# annotate the image
for pred in predictions:
   # print prediction
   print(pred)

   # extract the bounding box coordinates
   (x, y) = (pred["boxes"][0], pred["boxes"][1])
   (w, h) = (pred["boxes"][2], pred["boxes"][3])

   # draw a bounding box rectangle and label on the image
   cv2.rectangle(image, (x, y), (x + w, y + h), pred["color"], 2)
   text = "{}: {:.4f}".format(pred["label"], pred["confidence"])
   cv2.putText(
       image,
       text,
       (x, y - 5),
       cv2.FONT_HERSHEY_SIMPLEX,
       0.5,
       pred["color"],
       2
   )

# save annotated image
cv2.imwrite("annotated_image.jpg", image)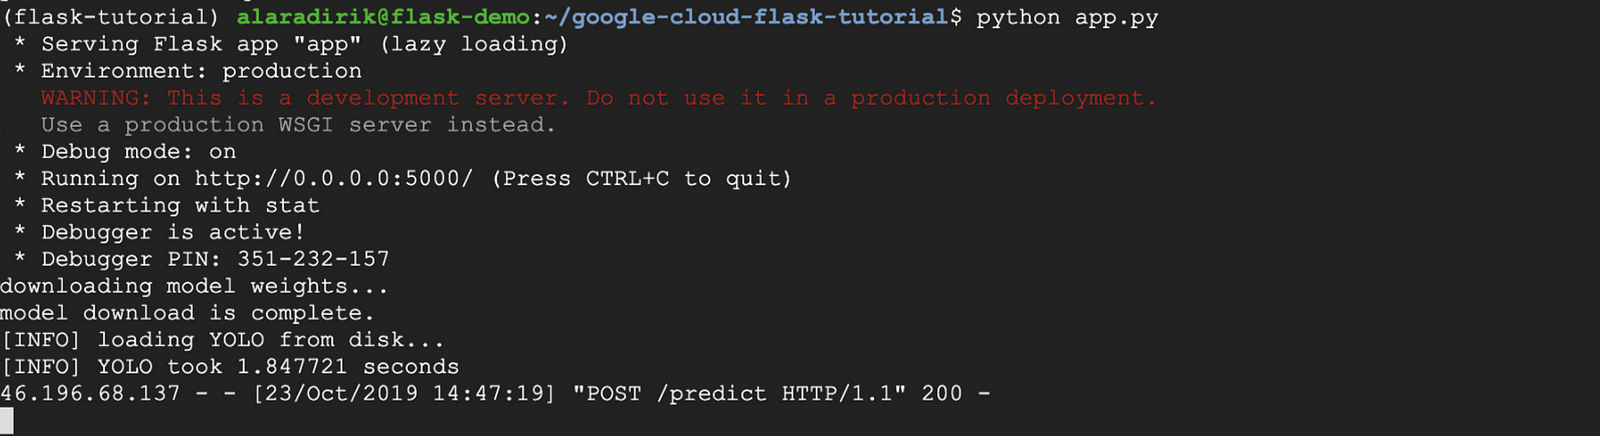
It will take a bit longer to receive a response the first time you send a request, this is because model weights need to be downloaded first.
Part 4: Setting up a Production Server with Gunicorn and NGINX
Flask is not a web server. It is a micro web application framework: a set of tools and libraries that make it easier and prettier to build web applications.
As a refresher, communication between clients and servers is done by requests and responses:
- A client sends an HTTP request to the web
- An web server receives the request
- The server runs an application to process the request
- The server returns an HTTP response (output) to the client
- The client receives the response
Flask can’t handle the HTTP requests and responses on its own but it comes with Werkzeug, a WSGI utility library that provides a simple web server for development purposes. While Flask’s development server is good enough to test the main functionality of the app, we shouldn’t use it in production. As the official docs state:
While lightweight and easy to use, Flask’s built-in server is not suitable for production as it doesn’t scale well and by default serves only one request at a time.
For this tutorial, we will be using Gunicorn and NGINX to create a production server that can handle multiple users and a high number of incoming requests, without users/clients having to wait noticeable amounts of time.
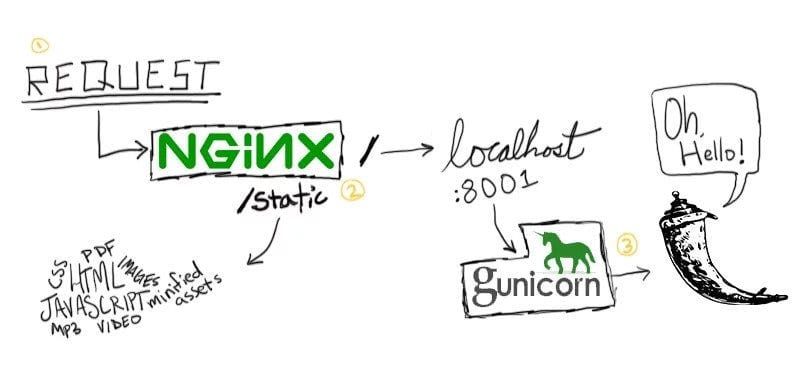
Gunicorn is a web server that can execute Python code (also called a WSGI server), we need to couple Gunicorn with NGINX, another web server, because there there are features of a non-Python based server (non-WSGI server) that we’d like to utilize: we can distribute requests through NGINX to multiple Gunicorn instances, serve static content without having to communicate with the Flask app, efficiently handle high connection levels, etc.
Heading back to the GCE instance terminal, the first thing we need to do is to install and start NGINX.
cd
sudo apt-get install nginx-full
sudo /etc/init.d/nginx start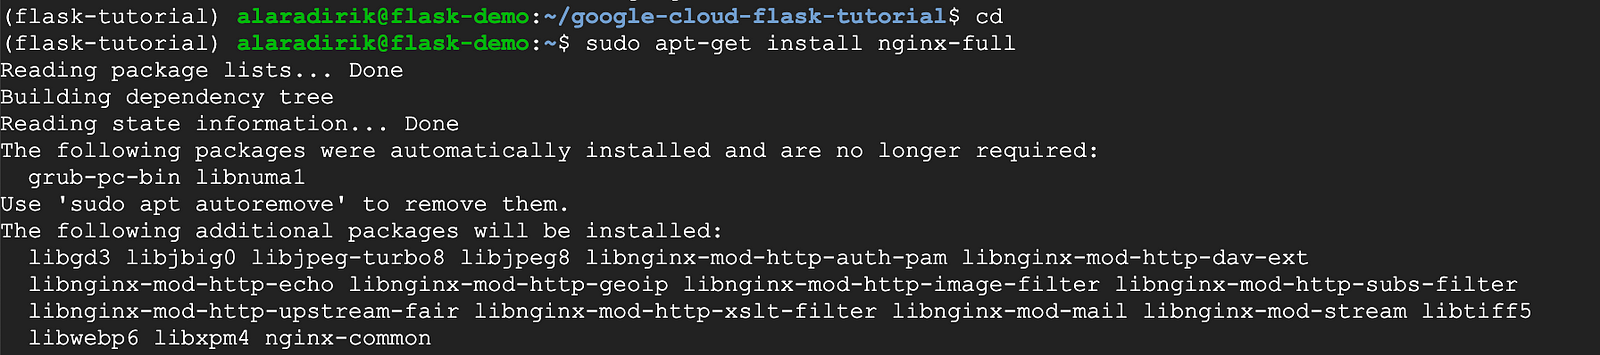
Next, we need to remove the default configuration file and create a new site configuration file for our flask application. Configuration files in sites-available are not active until they are enabled so we need to create a link for the new configuration file in sites-enabled.
# remove default configuration file
sudo rm /etc/nginx/sites-enabled/default

# create a new site configuration file
sudo touch /etc/nginx/sites-available/flask_project
sudo ln -s /etc/nginx/sites-available/flask_project /etc/nginx/sites-enabled/flask_project
We can now edit the configuration file for our app by opening the file with an editor like nano or vim:
sudo nano /etc/nginx/sites-enabled/flask_project
Copy and paste the code below and save the configuration file.
server {
    location / {
        proxy_pass http://0.0.0.0:5000;
    }
}
Restart the NGINX server.
sudo /etc/init.d/nginx restart
We are almost done! The last thing we need to do is to head back to the project folder and bind the Flask app to the Gunicorn server.
One important thing to keep in mind is we want the server and the Flask app keep running after we close the terminal window. Adding the daemon flag keeps the process running in background.
cd google-cloud-flask-tutorial
gunicorn --bind 0.0.0.0:5000 app:app --daemon
Conclusion
That’s it! You deployed an object detection model as an API on Compute Engine and setup a production server. You can close the Compute Engine terminal and send requests to the API anytime you want.
Hope you enjoyed the tutorial! If you want to see more content like this, follow us on Linkedin and subscribe to our newsletter.